

Introduction
In the previous post, we had a look at how to create an API request collection, import/export the collections, and run them via CLI. In this post, we'll build on that knowledge to learn how to run them in pipelines and integrate them with basic CI (or CD mechanism).
Points to note
- In this post, we'll be focusing only on the pipeline perspective. Hence, we'll be able to reuse our existing collection created as part of the earlier post.
- I will be using Azure DevOps, simply because of my familiarity with it, however, there is minimal to no provider-specific dependency.
- I will be using graphical user flow simply because that's convenient for the post. You can also refer to the attached YAML if you prefer.
- This post is not a post about "How to create pipelines". We'll only focus on the basics of how we can integrate API testing in our pipelines.
- API used in this post is totally independent and has no external dependency. Hence we're validating the integration pipeline, as that will allow early failures. In case your APIs have some external dependencies like databases, other services, etc., we can use these steps as part of deployment pipelines for post-deployment/release verification.
- We're using agents as hosts to run APIs. This is almost always not ideal, as agents are not very powerful machines and hence if you have very performant expectations, those may fail. Please use a more realistic host in such cases. I have used agent simply to avoid the complexity of creating infrastructure for this specific post.
WHY
While we've managed to get to a stage where we can run these requests via CLI, we still are running all of these locally. Developer machines have tons of settings/software that you'd normally not find on the testing/production environments. So it is very important that we can run this setup on a neutral environment with (hopefully) minimal dependencies before we can be confident that a work item is considered DONE.
WHAT
One way of achieving this would be running on some sort of VM or a dedicated machine. We can however utilize the cloud offerings to ease that up significantly. This may still mean we deploy and test it on some VM (or in this particular case, a pipeline agent), however, we'd automate this using DevOps Pipelines. Since we're adding it as part of the CI pipeline, we'd compile the code, publish it to some location, execute API, and then execute tests. If you're using it in the deployment verification pipeline, you might be reusing a pre-published artifact.
HOW
If you have no experience in DevOps or automation in general, the easiest way to understand it is by thinking about how can we achieve the same process locally, without GUI, and then replicating those steps. So in this post, let's break down this process into steps to replicate it in our choice of environment, DevOps pipelines or scripted.
1. The Code:
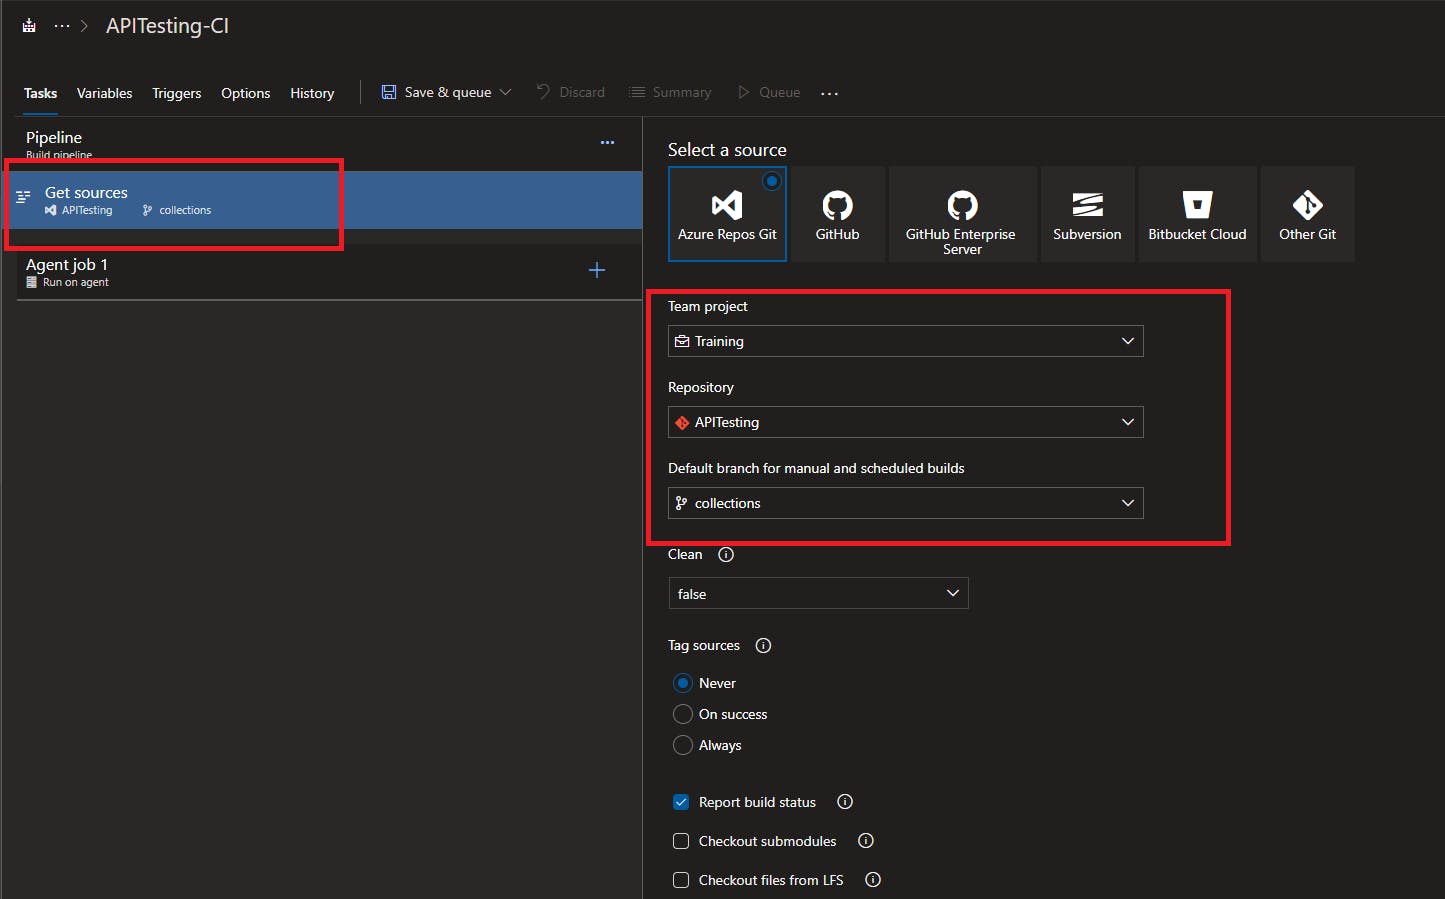
The very first thing we need is the code. We'd be using the code stored in the Github Repo.
2. Install prerequisites:
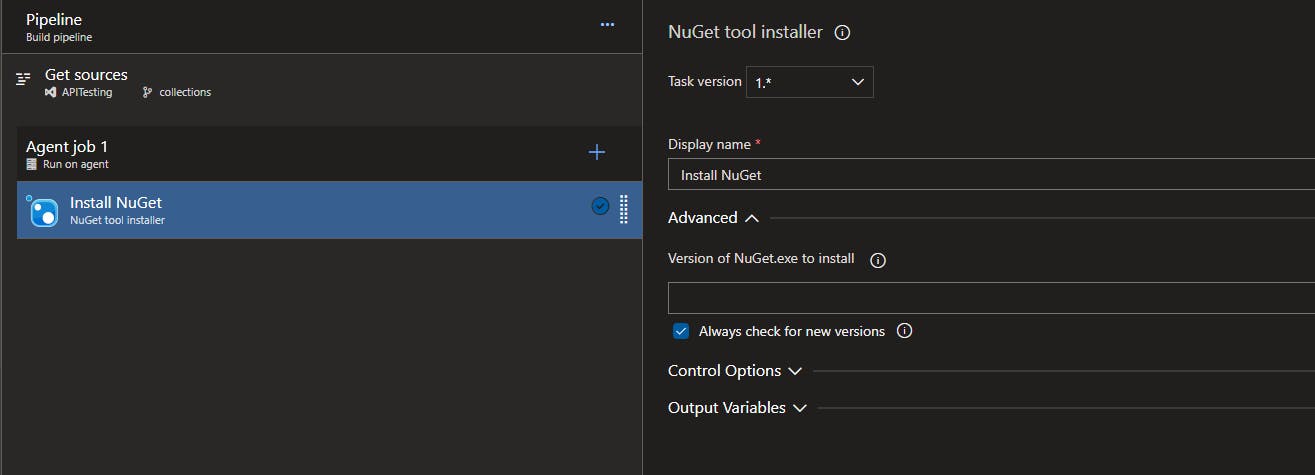
2.1 Nuget:
NuGet is a package manager for .Net-based applications. This is a third-party dependency, which we'll explicitly add.
2.2. Newman:
Newman is the other dependency. Azure pipelines usually provide Node.js out of the box. If not, you may want to install that explicitly before installing Newman. We can install Newman using npm install -g newman

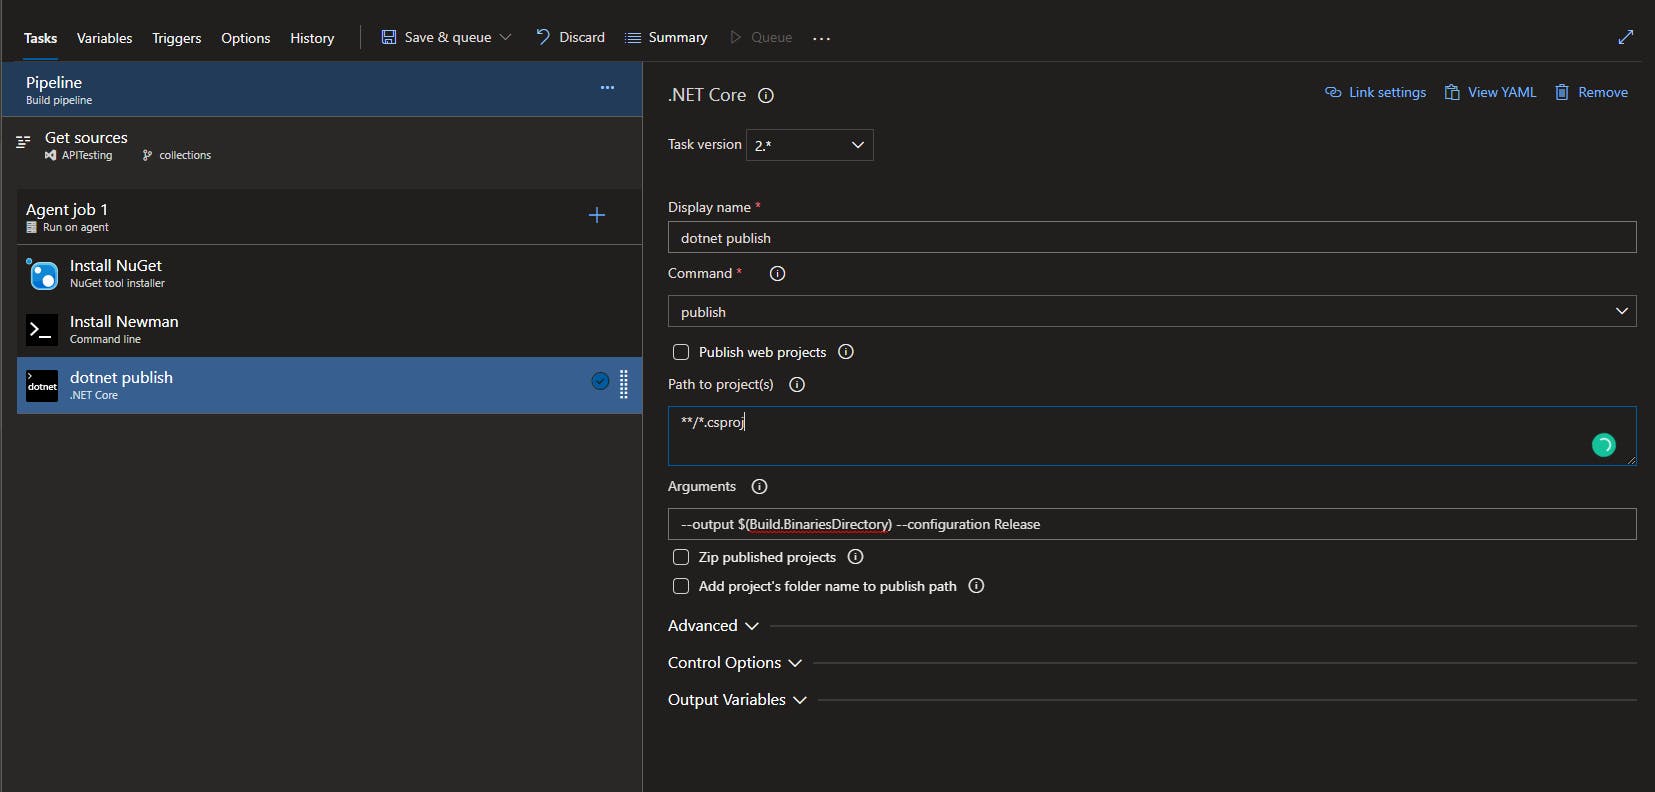
3. Create executable:
This is a technology-specific stage. Use relevant tools to compile/publish an executable artifacts. I will be publishing the binaries to a pre-defined location variable $(Build.BinariesDirectory).
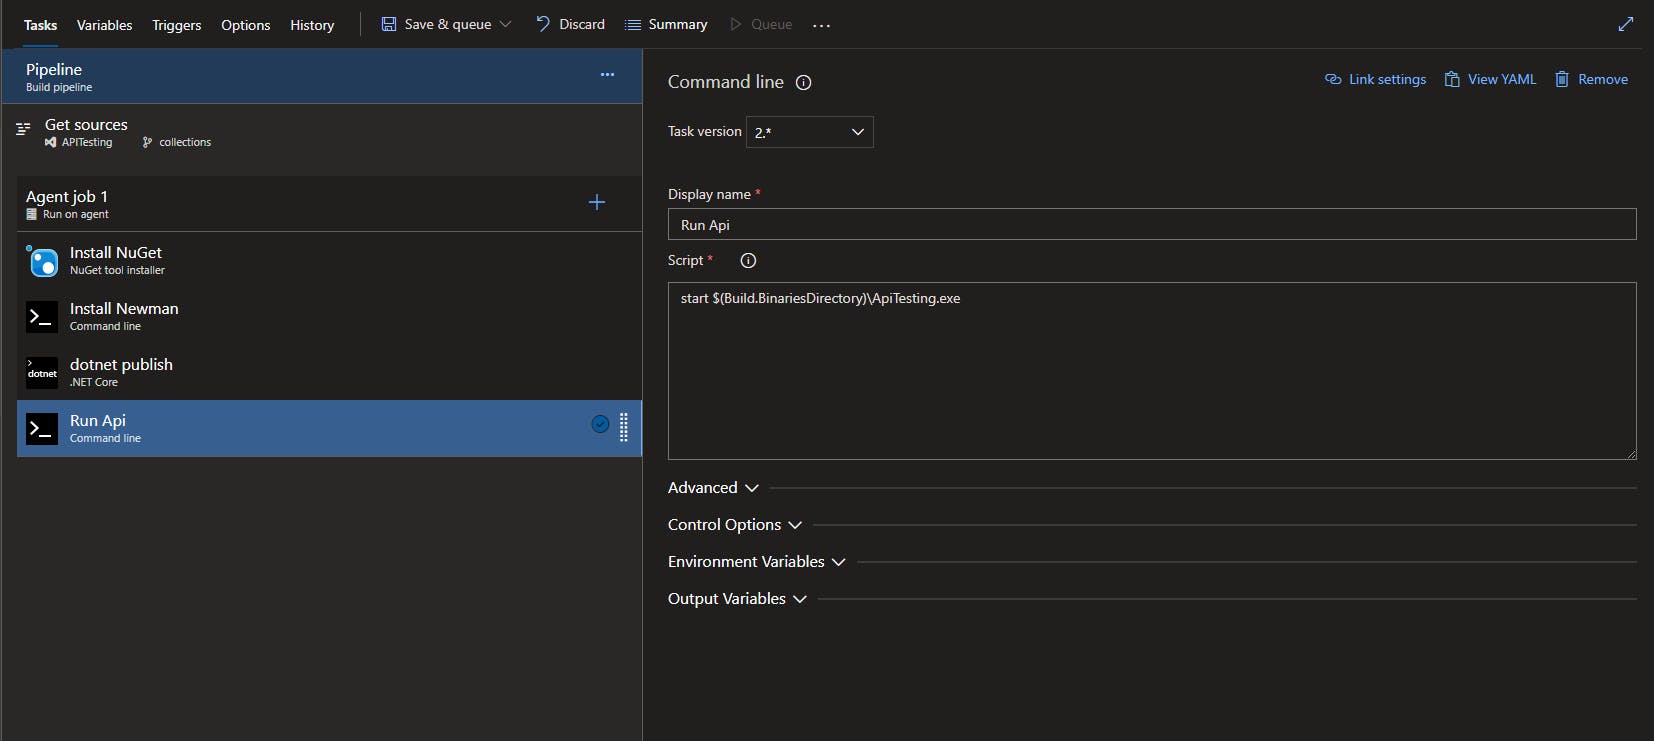
4. Run API:
Now we need to run the API to be tested. I have used a small trick here to run it in a non-blocking way.
start $(Build.BinariesDirectory)\ApiTesting.exe - This will call our API application, however not block the process flow.
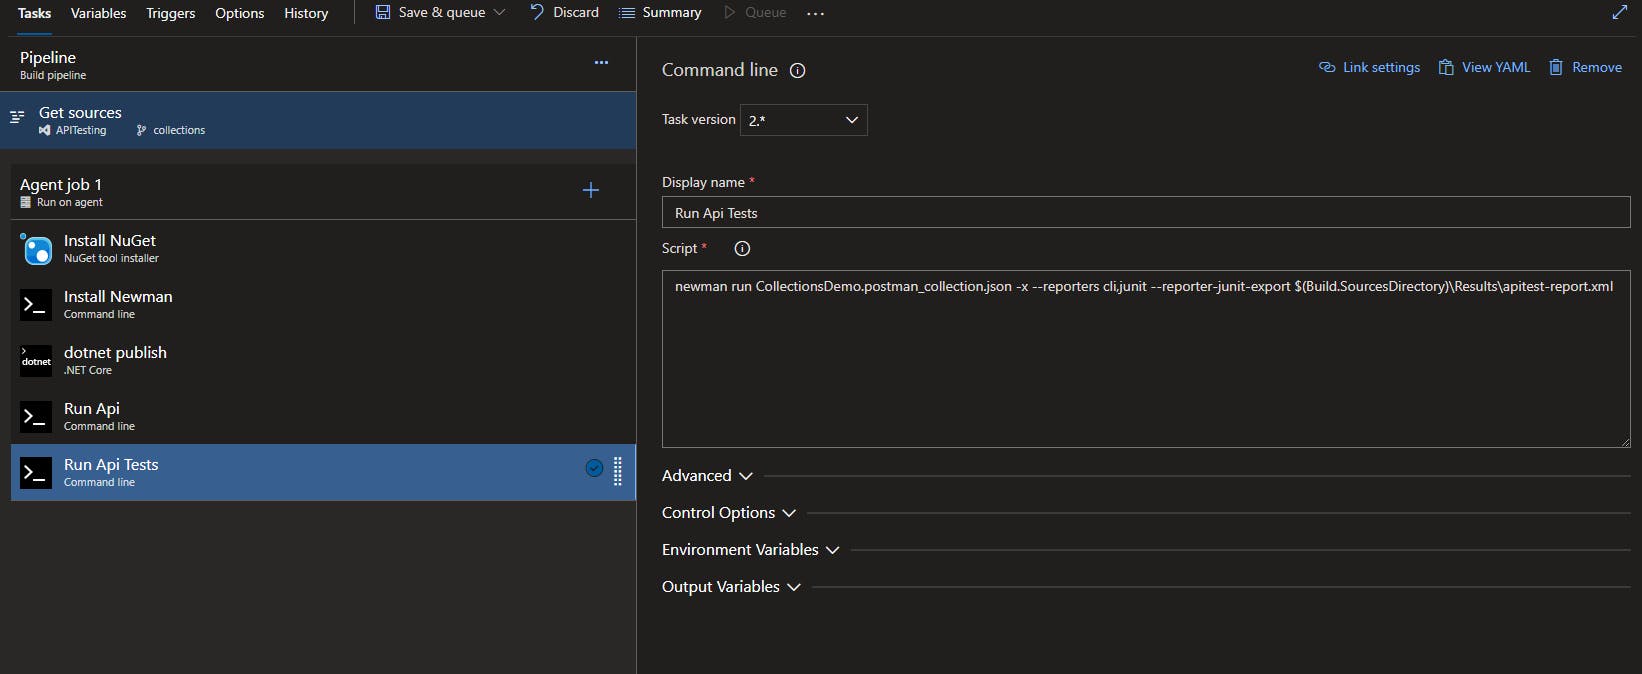
5. Run Tests:
Now that our API is running, we need to run our tests. Tests can be run using newman run <collection_file_path>. I have set the working directory for the task to the folder where we've kept the collection JSON file.
I have also added -x --reporters cli,junit --reporter-junit-export $(Build.SourcesDirectory)\Results\apitest-report.xml arguments to our run command.
-x - This instructs Newman to continue running tests in case of failures, and exits with code 0, i.e. considers the operation of running tests as successful. You may or may not want to allow this. As I am failing pipeline in Publish step instead, I am allowing this to be passed, so I can see all the failures as part of test results.
--reporters cli,junit - This will tell Newman to create reports on CLI, which is useful for quick debugging, as well as JUnit format. CLI reporter is not mandatory.
--reporter-junit-export $(Build.SourcesDirectory)\Results\apitest-report.xml - This will tell Newman to export the JUnit formatted test results to the provided location.
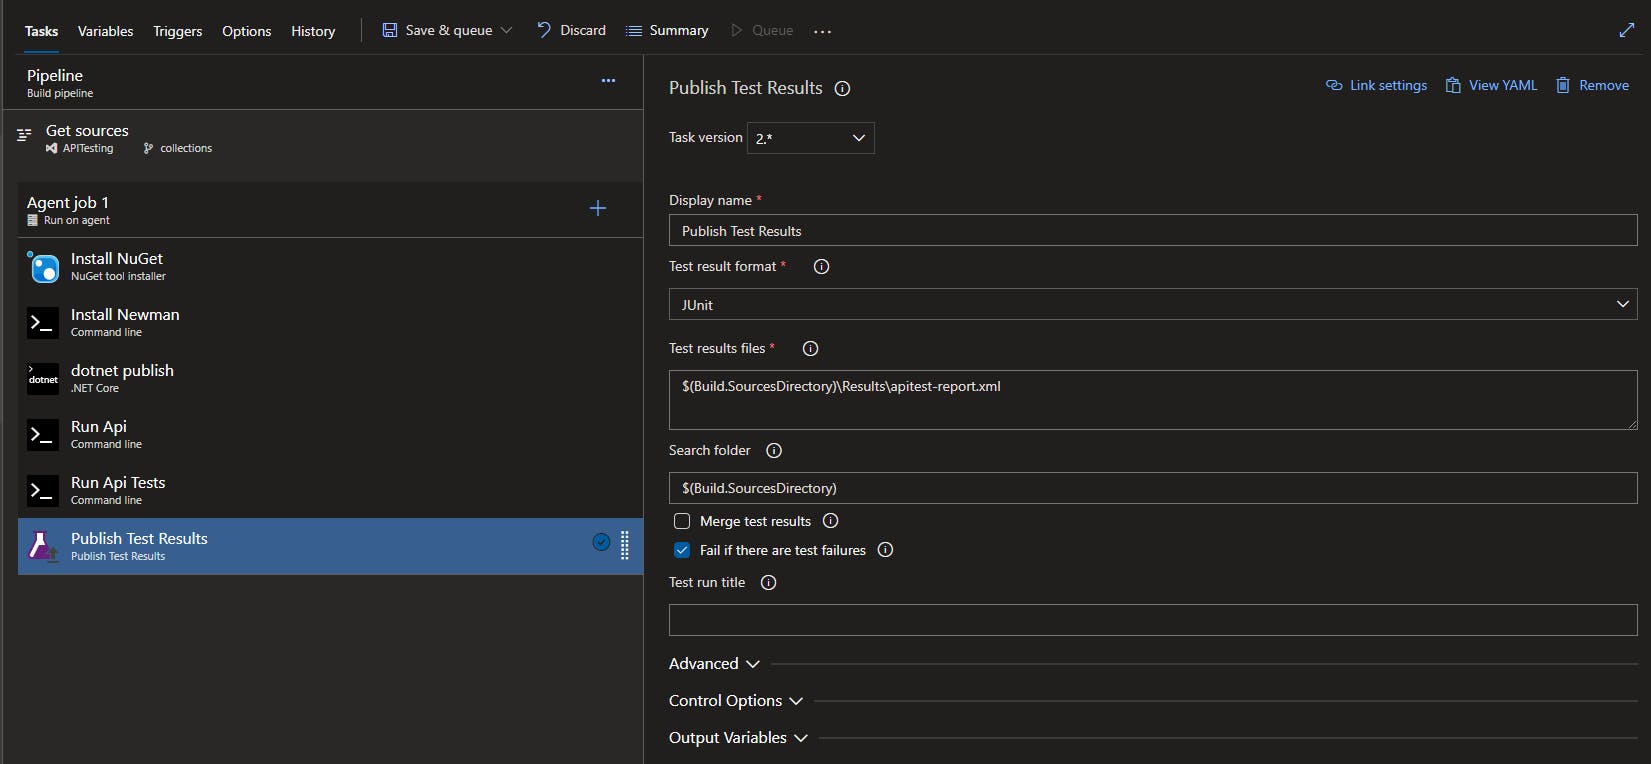
6. Publish Test Results:
Now that we've got results, we need to ensure our pipeline can read and display those results. We also want to ensure that the pipeline fails if the results have a test failure.
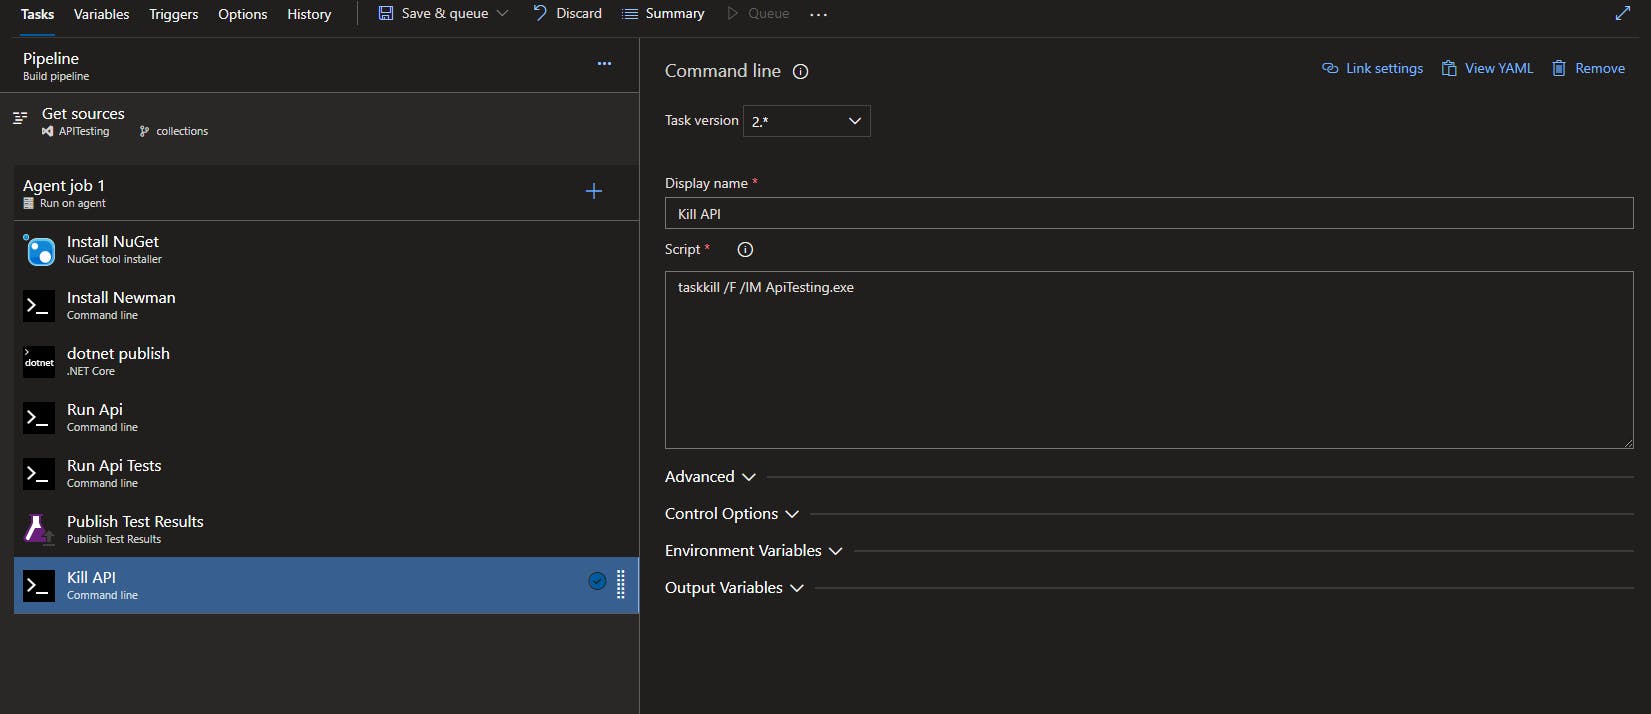
7. Stop API:
This is a cleanup task, not mandatory, but always a good practice to close the running application, especially on an On-prem agent.
taskkill /F /IM ApiTesting.exe - This will force kill an application called ApiTesting.exe
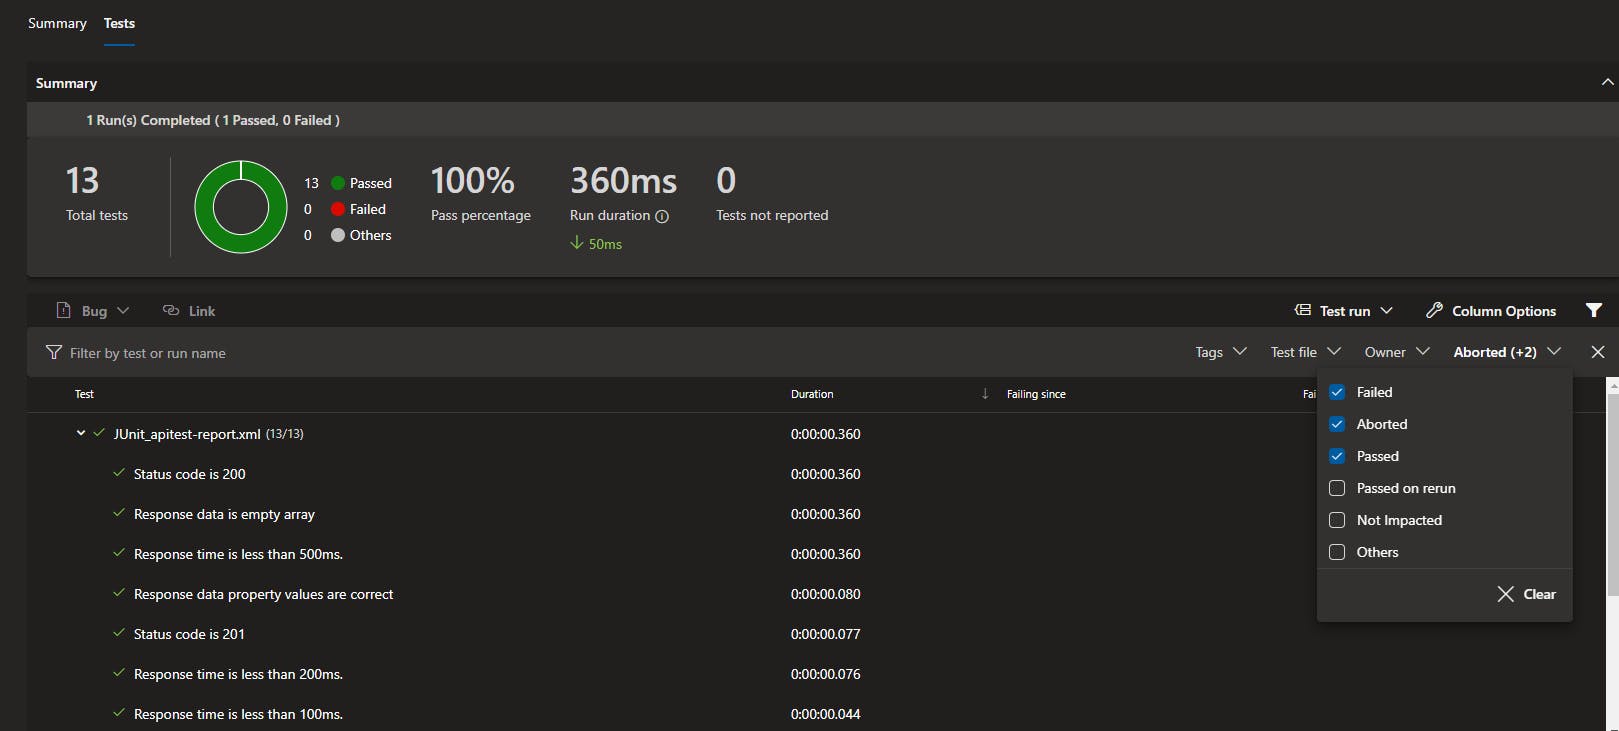
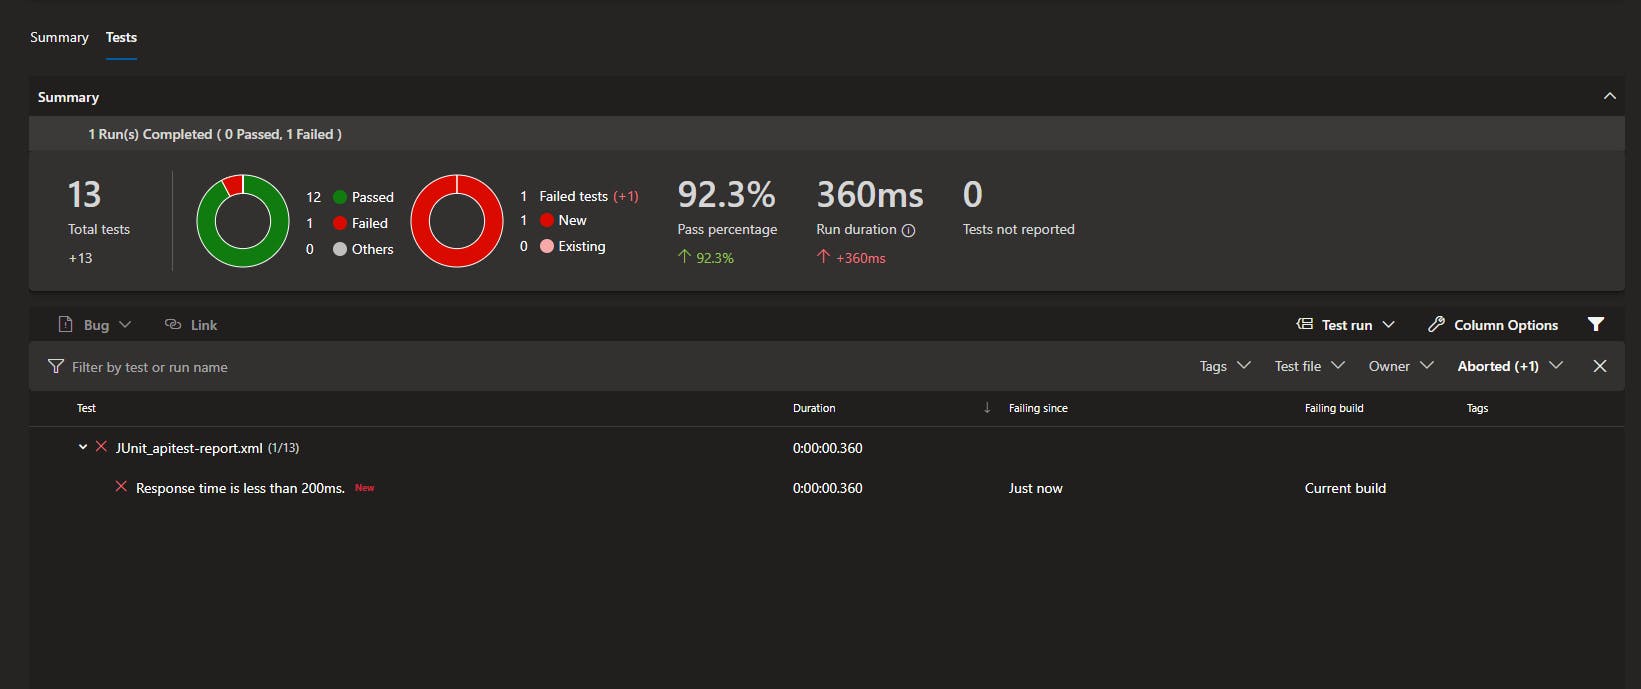
Now save and run the pipeline. If all configuration is correct, we should see the test results posted on the pipeline.
Successful Result
Error Result
We've now successfully created a way in which our API tests can be integrated into our CI/CD pipelines. This sort of brings to an end the basic end-to-end use-case of API testing with Postman.

While this brings to the closure of the basics, we've barely scratched the surface. In upcoming posts, we'll look into some of the advanced features that will make our tests more dynamic and closer to reality.